Thursday, December 29, 2011

Milk Maker Bread

I was a week postpartum. After spending a week in the hospital recovering from a cesarean, we found ourselves sitting at home with an overwhelming albeit, adorable bundle of joy. My nights suddenly consisted of late-night feedings every two hours or more. And my days were full of dodging rockets of pee that came shooting out of my son diaper, soaking my clothes before I knew what had hit me. It was the most intimidating, wonderful, exhausting time of my life. But needless to say, as much as I love cooking, I wasn't about to bother with mucking about in the kitchen. I had a newborn to take care of and a wicked abdominal incision to tend to so cooking was the last thing on my mind.

Thank God for family and friends!

With the outpouring of love that came from our family and friends, our refrigerator was stocked for nearly two months! But the one dish that really stood out in my mind was the Milk Maker Bread. A couple of my friends came over just days after we got back from the hospital and they, like many others, came bearing food. I was beyond grateful that neither my husband or I had to cook so that we could put our efforts towards the baby and supporting each other. But during their visit, my friend presented me with the Milk Maker Bread that she had made for me. I had never heard of it before but as she explained to me, the bread is so packed full of nutrients that it helps to support the production of breast milk. Not only was the bread nutritional but it was absolutely delicious! On the side, my friend also made a cinnamon honey butter spread to go with the bread and the combination was mouth-watering.
Each time I eat this bread I am reminded of those beautiful, warm, sunny summer days where I first held my newborn son in my arms. After a long and exhausting night of midnight milk and diaper explosions, it was such a treat to be able to just slice off a thick chunk of rich bread, warm is slightly in the microwave, slather it in sweet cinnamon honey butter, and devour it in seconds. It was the easiest breakfast and snack to grab in my exhausted state making it the best meal I could've hoped for.

Now don't freak out. This bread won't make you suddenly lactate. Though its nutrients help encourage an increase in breast milk, that's simply because has lots of healthy goodies in it. Regardless if you are a breastfeeding mom or a rough and tough bachelor, this bread is good for you and makes for an easy grab and go breakfast or snack. So don't let the name make you shy away from giving this recipe a try. I'd hate for you to miss out on the great taste of this amazing bread!


Milk Maker Bread

Ingredients
2 cups boiling water
1 cup rolled oats
1/2 cup honey
2 tablespoons butter
2 teaspoons salt
1 package (2 1/4 teaspoons) active dry yeast
1/2 cup warm water (110 degrees F/45 degrees C)
4 cups bread flour
2 tablespoons honey, warmed slightly
2 tablespoons rolled oats
2 tablespoons flax seeds
2 tablespoons brewer’s yeast

In a large mixing bowl, combine boiling water, oats, 1/2 cup honey, butter and salt. Let stand for 1 hour.

In a small bowl, dissolve yeast in warm water. Let stand until creamy, about 10 minutes.

Pour the yeast mixture into the oat mixture. Add 2 cups of flour, flax seeds, and brewer’s yeast; mix well. Stir in the remaining flour, 1/2 cup at a time, beating well after each addition. When the dough has pulled together, turn it out onto a lightly floured surface and knead until smooth and elastic, about 20 minutes. Lightly oil a large bowl, place the dough in the bowl and turn to coat with oil. Cover with a damp cloth and let rise in a warm place until doubled in volume, about 1 hour.

Deflate the dough and turn it out onto a lightly floured surface. Divide the dough into two equal pieces and form into loaves. Place the loaves into two lightly greased 9x5 inch loaf pans. Cover the loaves with a damp cloth and let rise until doubled in volume, about 40 minutes. Preheat oven to 350 degrees F.

Bake for about 30 minutes or until the top is golden brown and the bottom of the loaf sounds hollow when tapped. Remove loaves from pans, brush tops of loaves with 2 tablespoons honey and sprinkle with oats.

Serve warm with sweet cinnamon butter.

Sweet Cinnamon Butter
Butter (I buy the one made from yogurt), a drizzle of honey, and a bit of cinnamon, all whipped in the food processor.

Wednesday, December 28, 2011

Maple Toast and Eggs

Okay, so it kinda looks like your breakfast is sticking its tongue out at you but it really is tasty. This recipe is an adaptation of a recipe I found in my Taste of Home Holiday get-together cookbook. I actually made it for breakfast on Thanksgiving morning (no, you read that right. I said Thanksgiving. I'm a bit behind on my blogs thanks to the holiday madness), and it was really simple to make. Since there was enough competition for kitchen space, it was really nice having a quick and unique breakfast to whip out for the family.

It's sort of like having french toast, eggs, and bacon all rolled into one. So if you want the nice breakfast without all the mess and fuss, give this recipe a try. If you don't want the big bacon tongue sticking out, you can dice the bacon and sprinkle it into the cup before adding the egg if you wish. Personally, I'd like to see someone out there make this dish in a way that really makes it look like your egg is sticking its tongue out. Give it a face or something funny and post the picture. That would make my day!


Maple Toast and Eggs

Ingredients:
12 bacon strips
1/2 cup maple syrup
1/4 cup butter
12 slices bread
12 eggs
Salt and pepper to taste

In a large skillet, cook bacon until crisp; remove to paper towels to drain. In a small saucepan, heat syrup and butter until butter is melted; set aside.

Trim crusts from bread; flatten slices with a rolling pin. Brush one side generously with syrup mixture; press each slice into an ungreased muffin cup with syrup side down. Dived bacon among muffin cups. Carefully break one egg into each cup. Sprinkle with salt and pepper. Cover with foil.

Bake at 400 degrees for 18-20 minutes or until the eggs are set. Serve immediately.

Wednesday, December 14, 2011

Peppermint Popcorn

Man! I thought I had little free time just taking care of a baby, but then the holiday had to rear its ugly head. Now in between changing diapers, shopping for gifts, and wrapping up presents, I'm somehow supposed to find time to make holiday goodies. Well, if you're like me and you have little time to spare for baking treats for the company Christmas party, here is a recipe that will save you from getting a holiday headache.

Amongst all the fudge and frosting heavy desserts, this minty sweet treat is a nice change of pace. My husband made it for Thanksgiving this year and it was delicious! Not only was it quick and easy to make, but it was a big hit with the family. It is perfect for wrapping up and giving away in those holiday gift baskets for the neighbors, or for munching on while watching the Muppet's Christmas Carol (one of my holiday favorites!).

So enjoy this festive treat and spare yourself the pain of slaving away in the kitchen. If you use this recipe to save yourself a little time, use the time selfishly. Take a bath, rock out to some music, or munch on some peppermint popcorn.


Peppermint Popcorn

Ingredients:
4 quarts freshly popped corn
1 8oz box white Baker's chocolate
2/3 cup finely crushed peppermints

Put the popcorn in a large mixing bowl. Line a baking sheet with foil or wax paper and set aside. Melt the chocolate according to package instructions.

Drizzle the chocolate over the popcorn, gently stirring with a spoon to incorporate. Spread the popcorn evenly over the baking sheet and immediately sprinkle the crushed peppermints over the popcorn, lightly pressing the mints down with a spoon. Allow the chocolate to cool and harden, then break into pieces and serve.

Tuesday, November 29, 2011

Creamed Acorn Squash

Okay, I'm actually cheating a bit by posting this recipe because I didn't actually make this recipe, my mom did. But I was lucky enough to sample it. Since I didn't make this recipe, I don't have much to say about it other than: if you like warm, gooey, cheesy goodness, you'll enjoy this dish. From what my mom said (I feel like such a little kid saying that...), this dish is really easy to put together and makes a beautiful cold-weather meal. She also recommends serving it with pork if you're wanting to serve it with a protein. However, this dish can also stand well on its own.

I look forward to actually making this dish myself. But if you beat me to the punch, let me know how your experience was with trying this recipe and if you have any changes or suggestions.


Creamed Acorn Squash

Ingredients:
2 acorn squash, halved crosswise & seeds removed
course salt & pepper
½ C heavy cream
2 cloves of garlic thinly sliced
8 torn fresh sage leaves
½ C grated Gruyere cheese (or a sharp white cheddar)

Preheat oven to 375° F

Place squash cut sides up in a baking dish

Sprinkle with salt & pepper

Pour ½ cup water around the squash

Combine cream, sage, & garlic in a saucepan and simmer 5-10 min over medium high heat. (Do not let it come to a boil.)

Pour into acorn squash halves and bake 30-40 min until tender

Remove from oven and sprinkle with cheese

Cook 10 more minutes until cheese is melted and golden

Cool for 5 minutes before serving


Tuesday, November 22, 2011

Avgolemono (Lemon Chicken Soup)

Avgolemono. It's about as tricky to make as it is to pronounce (auv-go-le-moe-no). But never mind the fact that my spell check wants to change it to "Acclaiming" or "Overwhelming", which it may seem to be; Avgolemono is absolutely worth the effort. This is one of those soups that, to me, just taste like home.

At this time of year when you have to get up ten minutes earlier just to scrape the frost off of your car windows, hot soup is often the saviour to the soul (hmm...that almost sounds like a book title...). Especially out here in the North Wet where your soggy clothes cling to your body, forcing the cold air to seep deep into your bones, a hot cup of soup can often turn a gray day into a cozy one.

This Mediterranean soup is both hearty and fresh. With a lemon kick, it will awaken your senses from their winter hibernation. It takes a few extra steps to make than most soups, but believe me when I say, you'll be happy that you did.


Avgolemono

Ingredients:
½ onion diced
1 carrot cut into chunks
1 lb chicken breast fillets
1/3 c long grain rice
3 eggs, separated
6 Tbls lemon juice
2 Tbls chopped parsley

2 Tbls ground sage
salt and pepper to taste

Saute onion and carrot in hot oil 5 min then set aside.


Bring 6 cups water and add rice and chicken.

When chicken is cooked, shred and return to stock.

Add onion and carrots to soup.

Simmer just below the boiling point.

Whisk egg whites until stiff peaks are formed.

Gently stir in yolks to the egg whites.

Slowly beat in lemon juice in the egg mixture.

Slowly stir in 1/3 c of the hot soup to the egg mixture and beat thoroughly.

Continue to add some hot soup until egg mixture is warmed and thin.

Then slowly drizzle the egg mixture into the rest of the soup. Be careful to keep the soup below the boiling point or the eggs will curdle.

Add parsley, sage, salt, and pepper. Adjust the lemon to taste, adding more if you want a stronger lemon flavor.

Set aside for 3-4 minutes for flavors to mingle. Serve hot.

Thursday, November 17, 2011

Pumpkin Cake Pops

For years now I have been having an on-going love affair with pumpkin. This time every year, I sneak off to the local cafe to embrace my much adored pumpkin spice latte and succulent pumpkin bread. In the evening, I put my lips to a bowl full of sinfully delicious curry pumpkin soup. At night, I nibble on pumpkin seeds. And for dessert, I let the rich taste of pumpkin pie melt on my tongue. Oh yes, I LOVE pumpkin!

Just when I thought there were more than enough pumpkin sweets to choose from, I had to go and create yet another. It isn't enough that there is pumpkin pie, pumpkin cake, pumpkin chocolates....No. I had to take it one step further: pumpkin cake pops! The funny thing is, I wasn't intending on making cake pops when I started this recipe. In fact, I was trying to make a soft delicious pumpkin bread. The problem was, it was a little too soft! As I flipped over the bread pan, the bread fell apart along with my dreams of eating pumpkin bread that evening. But for all the sweet breads out there that fall victim to the sticky bread pan, there is a solution: cake pops. Its a wonderful way to turn a disaster into a ridiculously sweet and satisfying creation.

So thanks to the dangerously delicious invention of cake pops, I was able to still enjoy the sweet pumpkin flavor that I am infatuated with.

Now, I know the picture below isn't a picture of the pumpkin cake pops. But honestly, I didn't decorate the cake pops so they looked kind of plain. Instead, I'm taking to opportunity to be the annoying mom by showing off the other love of my life, my son. And hey, there's a pumpkin in the picture so it still counts, right?


Pumpkin Cake

Ingredients:
1 cup butter or margarine, softened
3 cups sugar
3 eggs
3 cups all-purpose flour
1 tablespoon baking powder
1 1/2 teaspoons baking soda
1 1/2 teaspoons ground cinnamon
1  teaspoons ground cloves
1 1/2 teaspoons ground nutmeg
1 1/2 teaspoon ground ginger
1 teaspoon vanilla extract
1 cup vanilla yogurt
1 (16 ounce) can solid pack pumpkin

In a mixing bowl, cream butter and sugar. Add eggs; mix well. Combine dry ingredients; stir into creamed mixture just until moistened. Stir in yogurt, vanilla, and pumpkin. Pour into two greased 9-in. x 5-in. x 3-in. loaf pans. Bake at 350 degrees F for 1 hour or until cake tests done. 

Pumpkin Cake Pops

Ingredients:
Cake (recipe above)

1 12oz container of frosting
White chocolate for dipping (make sure NOT to use white chocolate chips. They wont melt correctly. Be sure to use white chocolate that is specifically for melting and dipping such as Baker's chocolate!)
Lolly sticks (I just used bamboo skewers that I cut in half)
Styrofoam or other support base for drying the cake pops on

Once the cake is cool, crumble it finely with a fork. Scoop the frosting into the cake and stir until it starts to combine. Add more frosting as needed. The mixture will begin to feel soft like dough.

Using an ice cream scoop, or your hands, make round shapes about the size of a golf ball. Line on a baking sheet and freeze for 20 minutes. After 20 minutes, stick a lolly stick into each ball and freeze over night. Be sure to dip the tip of the stick into the melted chocolate BEFORE you stab into the cake ball. This will help secure the cake ball onto the stick, preventing it from sliding down the lolly stick later on.

Once the pops are firm, melt the chocolate in the a microwave safe bowl for about 1-2 minutes, or until thoroughly melted. Dip each pop in and gently shake off the excess chocolate.

Using a piece of Styrofoam or other support base, stick each cake pop upright so the chocolate can drip down over the cake pop as it sets. Store in an airtight container in the fridge or freezer until ready to serve.

Harvest Pork Medallions

It usually begins in October. As the Fall season settles in, our calender becomes heavy with scheduled events. One weekend we're celebrating our wedding anniversary. The next, we are going to the pumpkin patch with our parents. After that, there is the Halloween party with our friends. And as I watch the days grow shorter, the dark cold chill of winter whispering around the corner, the scheduled events quickly consume our calender as November steps in.  Before I know it, we're in a full on sprint towards the holidays and I am left standing elbow deep in a list of things to do.

Luckily, just as the holiday season begins to take its toll on my sanity, the Fall harvest flourishes with what are some of my favorite comfort foods. As I slip into my sweat pants in preparation for my "festively plump" physique, I sneak away into the kitchen and joyfully play around with the endless flavor combinations of Fall.

This dish was inspired by several classic flavor combinations: apples and cheese, garlic and onions, pork and apples, pork and onions, sage and cheese, and sage and pork. So what did I do? I threw them all together in hopes that it would create a flavor explosion. And that it did! In tribute to the Fall season, this dinner highlights several harvest delights in a juicy, hearty, and colorful display.

I totally made this recipe up, so if you have any comments or suggestions, I would love to hear them!


Harvest Pork Medallions

Ingredients:
2 medium-large pork medallions
salt and pepper to taste
2 Tbls olive oil
1 large apple, diced
1/2 yellow onion, sliced into strips
8 cloves garlic
3 Tbls olive oil
4 thin slices of brie
4 Tbls sage pesto (for the recipe, click on the following link: http://thetastyspoon-gingerales-kitchen.blogspot.com/2011/06/popeyes-pesto.html)

Preheat the oven to 375 degrees.

In an oven safe baking dish, combine the apple, onion, garlic, and 3 Tbls of olive oil. Place in the oven uncovered and bake for about 45-60 minutes or until soft, stirring occasionally.

Meanwhile, using the 2 Tbls olive oil, rub down each medallion so that both sides are evenly coated. Sprinkle with salt and pepper on both sides of the medallions.

Place the seasoned medallions in a cold pan and bring up to a medium high temperature. Starting off in a cold pan will allow the meat to retain its moisture as it is brought up to temperature. Allow the medallions to cook about 7-10 minutes on each side until they are golden in color. Then remove from the pan and place in an oven safe baking dish.

Remove the apple, onion, garlic mixture from the oven (when finished) and set the oven to broil.

Top each medallion with two slices of brie. Then place the medallions into the oven, uncovered, and broil until the brie is melted.

Remove medallions from the oven.

On a serving plate, smear the pesto onto the spot where the medallion will be placed. Set the medallion onto the pesto and top off with the baked apple, onion, garlic mixture.

Sprinkle with salt and pepper and serve hot.

Tuesday, November 8, 2011

Roasted Root Veggies

My goodness! It has been hard to find computer time these days. Thanks to my hyper-active baby who doesn't like to take naps, finding time to cook let alone blog is near impossible anymore! But for the few precious moments I have right now, I'm going to shoot out a quick blog of one of my favorite Fall dishes. It is super easy to make and it tastes fantastic! If you're looking for a great side dish to try this Thanksgiving, consider this recipe for roasted root veggies.

I don't know about you, but sometimes I get tired of sweet potatoes only being served in a brown sugary marshmallow mound on Thanksgiving day. This recipe, however, offers the naturally sweet flavor of the sweet potato without adding any additional sugar. And, in addition to caramelized garlic and onions, you'd be surprised how sweet, savory, and nearly buttery smooth this dish can be (even without the use of any butter!). Of course, you don't even have to use sweet potatoes at all if you don't want to. The glory of this recipe is that the ingredients are very flexible. You can use any combination of root veggies that you like. So have fun scouring the produce aisle for new and inventive ideas and enjoy this mouth-watering dish that flaunts all the savory flavors Fall has to offer.


Roasted Root Veggies

Ingredients:
Olive oil
Rosemary
Salt & pepper
Any assortment of your favorite root veggies:
  Example 1:
  Potatoes ( either sweet or other), Carrots, Onions, Garlic, and Apple (It’s not a root veggie but it adds good flavor)
  Example 2:
  Potatoes, Carrots, Beets, Onion, Garlic

Preheat oven to 375° F.

Cut all veggies into thick chunks (about 1 inch squares.) Place chunks into baking dish or pan. Drizzle with olive oil and stir until all veggies are slightly wet and shiny. Sprinkle desired amount of rosemary, salt, and pepper on top of veggies (rosemary is pretty strong in flavor so it doesn't take much).

Bake uncovered in oven for approximately 50 min. or until all veggies are soft when poked with a fork, stirring every 15-20 min.

Monday, October 24, 2011

Cream of Mushroom Chicken

I am going to take a moment here to do a little product advertising. (If only I was getting paid for this!) One of the best things you could ever invest in stocking your pantry with is: condensed Cream of Mushroom soup and condensed Cream of Chicken soup. These two condensed soups can act as the core ingredient for many different meals. Cream of Chicken soup is the main ingredient in my creamy chicken enchilada recipe. And Cream of Mushroom soup can act as a sauce for a pasta dish, as a gravy for chicken and mashed potatoes, and so much more. Rarely ever do I use these two soups as they are intended. So the next time you are in the grocery store, take a look at the different kinds of condensed soups and consider them not as soups, but as the base of a sauce. You'll be surprised at how delicious it can be and, even better, how easy it'll make preparing dinner!

This recipe in particular is one of the easiest dinner recipes ever, which is why I love it so much. It is great in flavor and wonderful for those cold fall evenings when I want something warm to eat. Whether I'm really busy, or just feeling lazy, I can whip this dinner out no problem. Also, if you have read my previous posts, you know that I am also promoting making double batches so you can freeze one batch and save it for another easy heat-and-eat dinner night. So below I have already doubled the amount. If you don't want to make a second batch to freeze, simply cut the ingredient amounts in half.


Cream of Mushroom Chicken

Ingredients:
 2 10oz cans Cream of Mushroom soup
 8 chicken breasts
4 teaspoon dried rosemary
1/2 teaspoon salt (I usually use garlic salt)
1/2 teaspoon pepper

Preheat oven to 375° F.

Place 4 chicken breasts into a medium sized casserole dish and the other 4 chicken breasts into a gallon freezer bag. Cover the chicken in the casserole dish with 1 can of condensed cream of mushroom soup. Then cover the chicken in the freezer bag with 1 can of condensed cream of mushroom soup. Sprinkle 1/2 of the rosemary, salt, and pepper over the chicken and soup mixture in the casserole dish, and the other half of the spices over the chicken and soup mixture in the freezer bag.


Cover the casserole dish with a lid or tin foil.

Bake in the oven for about 45 minutes or until thoroughly cooked.

Serve chicken hot. The soup and chicken grease will be liquidy and make an excellent gravy for mashed potatoes and veggies on the side.


Close the freezer bag, squish around the ingredients to help mix it together, and place into the freezer. When you are ready to cook the frozen chicken, simply defrost the chicken, place the contents of the bag into a casserole dish, and follow the cooking instructions above.

Friday, October 21, 2011

Creamy Chicken Enchiladas

Making dinner at the end of a busy day is often a pain in the neck. As a result, too many people turn to fast food to calm their growling tummies. But what if I told you that there is a way you can have a delicious home cooked meal ready with as little effort as turning on the oven? The answer: pre-made frozen meals. In the next few days, I will be posting recipes that are not only quick and easy to make, but they will be double the quantity so you can freeze half of it for a second meal. This way, if you make this dish on the weekend, you can save the other half for dinner during the week. And who could say no to an easy heat and eat dinner after a long day's work?

This recipe is one of my all time favorite dinners to make. It is a creamy, cheesy, gooey, delicious version of a classic: the chicken enchilada. Just be sure not to make the same mistake I did the night I made it for my best friend. Rather than use chili powder in the mix, I accidentally used cayenne pepper. My friend and I were fanning the flames from our mouths that night! But if you feel adventurous, this recipe is one that you can easily play with. I often will toss in corn and bell pepper just to mix things up. Or, to make a low-fat version, use low fat cream of chicken soup and low fat yogurt.


Creamy Chicken Enchiladas

Ingredients:
1 cup cooked chicken, shredded
1 cup plain yogurt
2 cans cream of chicken soup
1 cup shredded Cheddar cheese
¼ cup chopped green onions
1 Tablespoon chili powder
1/3 cup sliced olives
10 flour tortillas

Foil line two 8x8 baking pans. Spray both with cooking spray.

Combine chicken, yogurt, soup, 2/3 of the cheese, onions, and chili powder. Place about ¼ cup of mixture in each tortilla and roll. Place 5 rolls in each pan and cover with remaining chicken mixture. Top with the remaining cheese. Place one pan in the freezer for a future meal.

Cook the unfrozen Enchiladas at 350° F for 30 min.
To prepare frozen enchiladas, simply defrost and cook as directed above.


Shredding Chicken

This post is just a quick tip about shredding chicken. It is a simple and quick technique that will help volumize the chicken (no, I'm not talking about giving your chicken a stylish hairdo), and distribute it more evenly throughout your dish. I use this technique whenever I make enchiladas (the recipe soon to come) so that I can have plenty of chicken throughout my dish without really using a lot of chicken. So in the long run, this two minute process can help you save some money too!

Do you want to know the grand secret?....Shred it with a fork! It's a no-brainer, right? Well, when I was new to the kitchen, I had no idea about shredding chicken. I had thought that shredding chicken involved shoving a chicken breast into the food processor, pulverizing the poultry to bits. But really, it's even easier than that! Simply hold down the cooked chicken breast with either your hand or another fork and then, using another fork, scrape at the chicken breast. The chicken breast will look kind of stringy and begin to pull apart. Continue to scrape at the breast until the entire breast has been shredded. That's it!


You can use this technique for making pulled-chicken sandwiches, for soups, or basically anywhere where a recipe calls for "cubed chicken." Shredding the chicken not only distributes it more evenly throughout your dish, but it also makes it a little softer to chew for those of you who don't particularly like nomming on a rubbery chunk of chicken.

So shred away, readers!

Friday, September 30, 2011

Lemon Meringue Pie

Meringue shrinkage. It is a serious condition effecting pies nation wide. And no matter how many times I tried, my pies would suffer greatly from it. Time and time again I attempted to make the perfect meringue for my lemon meringue pies. But sadly the limp, small, weepy, lifeless meringue would practically shrink away from existence leaving the lemon curd to stand alone in shame.

Not any longer! Finally I have discovered a recipe that has put a stop to this epidemic. Meringue shrinkage is now a thing of the past. When I first read the recipe for this unique meringue, it certainly stood out amongst the rest. I was used to the usual whipping of egg whites and sugar, but this technique is truly one of a kind. It may require a few more ingredients but boy was it worth it. The end result was a big, firm, fluffy, mile-high meringue that tasted like vanilla clouds.

So if your lemon meringue pies have been suffering from some serious meringue shrinkage, give this recipe a try. Not only will you have picture perfect meringue, but you'll have a deliciously sweet and tangy pie that will satisfy any sweet tooth.


Lemon Meringue Pie

Ingredients:

Pie Crust:
1 1/4 cups flour
1/2 teaspoon salt
1/3 cup shortening
3-4 tablespoons cold water

Lemon Filling:
1 cup sugar
1/4 cup cornstarch
1/8 teaspoon salt
6 large egg yolks
1 1/2 cups water
1 tablespoon lemon zest
1/2 cup lemon juice (fresh from 2 - 3 lemons)
2 tablespoons unsalted butter

Meringue Topping:
1 tablespoon cornstarch
1/3 cup water
1/4 teaspoon cream of tartar
1/2 cup sugar
4 large egg whites
1/2 teaspoon vanilla

Pie Crust:
In a mixing bowl stir together flour and salt. Cut in shortening until pieces are the size of small peas. Sprinkle 1 tablespoon of the water over the flour mixture. Gently toss with a fork. Repeat until all is moistened. Form dough into a ball. On a lightly flour surface, flatten dough with hands. Roll dough from center to edge, forming a circle about 12 inches in diameter. Wrap pastry around rolling pin. Unroll onto a 9-inch pie pan. Ease pastry into pie pan, being careful not to stretch pastry. Trim to ½ inch beyond the edge of the pie pan; fold under extra pastry. Make a fluted or scalloped edge using a fork. Prick the bottom and sides of the pastry with a fork. Bake in a 450 degree oven for 10 to 12 minutes or until golden. Cool on a wire rack.

Lemon Filling:
Whisk sugar, cornstarch, and salt together in a large, saucepan.
Add egg yolks, then immediately but gradually whisk in 1 1/2 cups water.
Bring mixture to a simmer over medium heat, whisking regularly, 8- 10 minutes, until thickened.
Remove from heat, whisk in zest, then juice, and finally butter.
Keep warm until meringue is made.

Preheat oven to 325 degrees.

Meringue topping:
Mix cornstarch and 1/3 cup water in a small saucepan.
Bring to a simmer, whisking occasionally until thickened.
Remove from heat when translucent and thickened.
In a large mixing bowl, mix cream of tartar and sugar together.
Beat egg whites with whip attachment of mixer until frothy. Add vanilla.
Beat in sugar mixture, 1 tbsp at a time.
Then drop in cornstarch mixture, 1 tbsp at a time until stiff peaks form.
Pour warm lemon filling into pie crust.
Distribute meringue evenly over the top, starting with the edges, and then the middle.
Make sure it attaches to the crust.
Lifting with the back of the spoon, create peaks in the meringue.

Bake until golden brown, about 20 minutes.

Cool completely before serving.

Thursday, September 29, 2011

Lavender Honey Butter

For the past two years, my husband and I have celebrated our wedding anniversary by dining at the famous Sky City restaurant at the top of the Space Needle. Perched on the crest of the beautiful Seattle horizon, this restaurant offers nothing but savory elegance brimming from their masterful entres, all the way down to the delicious details of the butter served with warm bread before dinner. It was there that I first experienced the subtle sweet taste of lavender honey butter.

I realize the humor in the fact that, out of all the amazing food the restaurant has to offer, I chose to seek out a recipe for the butter. However, it was the warm bread and butter that first welcomed us to the table before our meal even began. And it was that very same bread and butter that stuck in my mind throughout the entire evening. So that night, I came home and began hunting for the recipe online.

Luckily for me, I came across the recipe (found at http://www.food.com/) and have been enjoying it ever since. Whether you're sampling it in a fancy restaurant, or simply savoring it with tea and a biscuit in the comfort of your own home; this easy-to-make butter recipe is one worth sharing.


Lavender Honey Butter

Ingredients:
1 cup softened salted butter
1 1/2 teaspoons dried lavender, crushed
1 tablespoon honey

Mix ingredients thoroughly.

Shape the softened butter into a log and wrap with waxed paper or plastic wrap. Place into the freezer until firm.

Once firm, transfer the log into the refrigerator until ready to use.


Lavender Lemon Pound Cake

I have had a long standing love affair with lavender. During finals week at college, it was my lavender scented shampoo that helped calm me down after a stressful day of tests. In mid summer, the vibrant purple flowers of the lavender bushes flirted with my senses. And it wasn't until a few years back that I finally discovered that lavender could tickle my taste buds as well.

The first time I discovered a recipe that involved lavender was, I am embarrassed to admit, in a wedding magazine. As I flipped through the pages of day dreams, I stumbled upon a recipe for lavender shortbread cookies. Enthralled by the notion of cooking with lavender, I immediately set to work on testing out the recipe. Although I loved lavender dearly, I thought for sure that a lavender cookie would taste nothing short of munching on potpourri. But boy was I wrong! It was a whole new flavor I had never experienced before. Mingling with the buttery sweet taste of the shortbread was an aromatic, earthy flavor that is hard to describe.

Ever since that day I have been trying to think of new lavender concoctions, allowing this distinguished new flavor an equal opportunity in the world of desserts. And this weekend I finally took the plunge, testing out one of my ideas: lavender lemon pound cake. It was my hope that the sweet, tart flavor of the lemon pound cake would blend harmoniously with the distinctive taste of lavender. I am happy to say, the experiment was a success! This new twist on a classic dessert brought to light a whole new explosion of flavor that I feel quite proud of. I had to take a picture of the small heal of cake that was left before the last of it was consumed by my husband! This turned out to be one popular cake!


Lavender Lemon Pound Cake

Ingredients:
16 tablespoons unsalted butter (2 sticks), plus 1 tablespoon, softened, for greasing pan
1 1/2 cups flour, plus 1 tablespoon for dusting pan
1 teaspoon baking powder

1/4 cup dry lavender buds
1/2 teaspoon salt
1 1/4 cups granulated sugar
2 tablespoons grated lemon zest

1/4 cup lemon juice (from 1-2 medium lemons)
4 large eggs
1 1/2 teaspoons vanilla extract


Lemon Glaze (Optional)
1/2 cup granulated sugar
1/4 cup lemon juice (from 1-2 medium lemons)


Adjust oven rack to middle position and heat oven to 350 degrees. Grease 9 by 5-inch loaf pan with 1 tablespoon softened butter; dust with 1 tablespoon of flour, tapping out excess. In medium bowl, whisk together flour, baking powder, dried lavender buds, and salt; set aside.
In glass measuring cup or microwave-safe bowl, microwave butter, covered with plastic wrap, at full power until melted, 1 minute.
In a medium bowl, mix together sugar and zest until combined. Add lemon juice, eggs, and vanilla; beat together with an electric mixer until combined, about 5 seconds. While beating, gradually add melted butter in steady stream. Transfer mixture to large bowl. Sift flour mixture over egg mixture, whisking gently after each addition until just combined.

Pour batter into prepared pan and bake 15 minutes. Reduce oven temperature to 325 degrees and continue to bake until deep golden brown and skewer inserted in center comes out clean, about 35 minutes, rotating pan halfway through baking time. Cool in pan for 10 minutes, then turn onto wire rack.
If using lemon glaze, while cake is cooling in pan, bring sugar and lemon juice to boil in small saucepan, stirring occasionally to dissolve sugar. Reduce heat to low and simmer until thickened slightly, about 2 minutes.
After turning cake onto wire rack, poke the cake's top and sides with a toothpick and drizzle on Lemon Glaze. Cool to room temperature, at least 1 hour.

Friday, September 23, 2011

Chicken & Vegetable Kabobs

Although it is technically the first day of fall, today has turned out to be hotter than it was mid summer. And like most sunny days around here, everyone is running outside to mow their lawns and fire up the barbecue before the rain takes back its throne over this sodden city. So in honor of this unusually nice weather, I decided to post a classic summer-time dish for those of you who want to squeeze in one last barbecue before the weather turns sour. This is an extremely easy dish to make that packs in a lot of flavor. So fire up the barbie, strap on your "kiss the cook" apron, and enjoy the taste of summer before the fall season truly settles in.


Chicken and Vegetable Kabobs

Ingredients:
Chicken, cubed
Onion, cut into chunks
Bell pepper, cut into chunks
Mushrooms
Eggplant, cubed
*1 bottle of Italian dressing

Place all ingredients in a bowl and coat generously with Italian dressing. Cover and allow it to marinate in the refrigerator for about 30 minutes to an hour, stirring occasionally so that everything is evenly coated.

[If you are using metal skewers, skip this step.] While the veggies and chicken are marinating, soak bamboo skewers in water so they wont burn when barbecuing.

Pierce the marinated vegetables and chicken onto the bamboo skewers. Place kabobs on the prepared barbecue and cook, turning occasionally so all sides are cooked evenly, until the chicken is cooked all the way through.

Remove from the barbecue and serve hot.

*If you don’t have Italian dressing, combine the following ingredients into a jar and shake well to mix. Continue recipe as follows.

¾ cup olive oil
¼-½ cup red wine vinegar
1 tablespoon oregano
1 tablespoon basil
1 tablespoon sugar
½ teaspoon pepper
1 teaspoon garlic salt

Wednesday, September 21, 2011

Bacon Wrapped Stuffed Chicken

In this day and age there is bacon everything: bacon vodka, bacon flavored mints, bacon salt, bacon chocolate, bacon maple bars, bacon scented soap, even band aids that look like bacon (which I find particularly gross. Why would you want to put what looks like raw pig meat on your open wound?). The bacon craze has taken over the world producing some of the most horrifying bacon concoctions out there. What ever happened to a simple side of crispy bacon next to some scrambled eggs and toast?

Now don't get me wrong. I often will save leftover bacon grease to use as a fat for sauteing onions and mushrooms in, or for other pan cooked dishes. But with all the bacon Frankensteins out there, I was honestly afraid to play around with this celebrated ingredient.

It wasn't until we recently bought some peppered bacon that I began toying around with the idea of using it other than as a side dish with breakfast. Normally when I hear about a bacon-wrapped something-or-other, I can't help but avoid it in fear that I will fall in love with its artery clogging goodness. (I once tried a bacon wrapped stuffed jalapeno that was dangerously delicious!) But since my husband and I have been under a lot of stress with house hunting and adjusting to parenthood, I figured we deserved a little comfort food. But could I pull off a bacon dish that wasn't a bacon-stein?

Well much to my excitement, and my husband's delight, the dinner turned out to be a great success! I even gave samples to my parents and the neighbors next door. Everyone raved about it! So here is it, my contribution to the bacon craze. There isn't much of a story to tell as to why I did stuffed chicken. Quite honestly, I did it simply because we had a lot of chicken, some leftover goat cheese, and because I had fresh Swiss chard at my disposal. I looked at the ingredients and the recipe practically wrote itself.


Bacon Wrapped Stuffed Chicken

Ingredients:
4 boneless skinless chicken breasts
6 tablespoons soft goat cheese
2 cups Swiss chard, shredded
8 strips of bacon
Paprika
Garlic salt
Pepper
8 grape tomatoes, halved
Olive oil

Preheat the oven to 375 degrees

Lightly drizzle olive oil in a oven-safe baking dish. Set aside.

Working with one chicken breast at a time, wrap the chicken breast in plastic wrap and beat with a wooden mallet until flat and tenderized. Flip the chicken breast over and repeat.

Once all the chicken breasts have been flattened and tenderized, sprinkle both sides of the breast with garlic salt and pepper. Season only one side (the inside of the breast) with paprika, using only about ½ teaspoon on each breast depending on the size of the chicken breast.

Break up the goat cheese and distribute as evenly as possible on the inside (the side with the paprika) of the breast. Then top the goat cheese with Swiss chard.

Grabbing one end of the breast, begin gently stretching and rolling the chicken breast onto itself to create a roll (the goat cheese and Swiss chard should now be rolled up inside the chicken breast). Pin the edges of the chicken breast together with wooden toothpicks so that the stuffed chicken will stay together.

Wrap the bacon strips in plastic wrap and, using a wooden mallet, pound the strips of bacon until they are flat. Then gently take the tenderized bacon strips and carefully wrap them around the stuffed chicken breasts. You may need to remove and then reinsert the toothpicks as you go, or you can try skewering the bacon onto the toothpicks that are already in place.

Once the stuffed chicken has been wrapped in bacon, place each breast into the lightly oiled baking dish. Toss the grape tomato halves into the dish over the chicken and drizzle with about 2 tablespoons more of olive oil. Sprinkle additional pepper over the chicken. Cover with a lid or tinfoil.

Bake for about 45 minutes until the chicken is cooked completely through. Remove the toothpicks and serve hot.

Raspberry Sorbet

If you are looking for cold refreshing dessert that requires very few ingredients, look no further! Just about anyone with a surplus of berries and some time to kill can make this dessert. I do give you fair warning though: it's not a very hard dessert to make but it does require a good amount of time. Unless you have a magical raspberry bush that makes seedless berries, you're going to find that sifting out the seeds will be the most time consuming part of this dessert. But don't let that discourage you. It is well worth it! Of course, you can make this dessert with just about any kind of berry. It doesn't have to be raspberry. I was just lucky enough to come across a goldmine of raspberries tucked away in my parent's big freezer, raspberries that they so generously shared with me. I realize it's a little late in the season now for a cold dessert like sorbet considering that this Friday will be the first official day of fall. But perhaps you can make some tomorrow as a farewell tribute to summer.


Raspberry Sorbet

Ingredients:
2 cups sugar
2 cups water
4 cups raspberries, hulled and sliced
6 tablespoons lemon juice
1/2 cup honey

Bring the sugar and 2 cups water to a boil in a medium saucepan over medium-high heat.
Reduce the heat and allow the mixture to simmer, without stirring, until the sugar dissolves, about 3-5 minutes. Set aside to cool completely.

Place the raspberries and lemon juice in a food processor and puree. Press the raspberry puree through a strainer to remove the seeds. When the sugar syrup has cooled completely, combine with the raspberry puree. Add the honey and stir well.

Pour the mixture into a glass/ceramic pan and freeze. Stir every 30 minutes until sorbet hardens.

Spaghetti with Braised Kale and Oven Roasted Tomatoes

Delicately I balanced the plate on my swollen pregnant belly as I shoveled in mouthfuls of the delicious dinner before me. My husband was working late that night and so my friends, generously helping me out in my puffy tired state of being, came over to cook me dinner. Normally when I make a pasta dish, spaghetti in particular, I can't say that I am that creative. Usually I slather it with pesto sauce or the traditional marinara sauce that so commonly is coupled with spaghetti noodles. But that night, my friends opened my mind to a whole new spaghetti dish that is both rich and light all at the same time. It was an aromatic dish that depended solely on the other ingredients to add flavor to the pasta rather than a heavy sauce. And yet the creamy smooth texture of the melted goat cheese offered a depth of flavor that made this dish truly unique.

I never did ask for a written-out form of this recipe. It was nothing more than a verbal discussion of ingredients amongst friends. So below, I posted a recipe that is compiled from both memory and my own liberties. Hopefully this recipe will break the nasty preconceived notion that spaghetti is a dish made with stringing noodles, a tomato based sauce, and the occasional ball of seasoned meat. But rather, spaghetti is a type of pasta that can give birth to many wonderful culinary possibilities.


Spaghetti with Braised Kale and Oven Roasted Tomatoes

Ingredients:
10-15 grape tomatoes, halved
4 cloves garlic, crushed
Salt and pepper to taste
2-3 cups braised kale, chopped (here is a link to the recipe: http://thetastyspoon-gingerales-kitchen.blogspot.com/2011/09/braised-kale.html)
Spaghetti, cooked
¼ cup olive oil, plus extra to drizzle on tomatoes
¼ cup herbed goat cheese
Freshly grated parmesan cheese

Set the oven to broil.

Arrange the grape tomato halves on a pan so that they are facing open side up. Drizzle with olive oil and crushed garlic. Sprinkle with salt and pepper. Set in the oven and broil until they are slightly shriveled on the sides and juice is running out. About 10-15 minutes.

While the tomatoes are cooking, boil water and cook the spaghetti until soft. When done, drain out the water and mix in the ¼ cup of olive oil into the spaghetti until all the pasta is coated.

In a large bowl, combine the roasted tomatoes, braised kale, cooked spaghetti, and herbed goat cheese while all ingredients are hot. Continue to mix the ingredients as the herbed goat cheese melts, creating an even coat of cheese throughout the pasta.

Serve hot and top with freshly grated parmesan cheese.

Friday, September 9, 2011

Almond Flax Wafer Cookies

With my days devoted to my newborn son, I have been feeling a bit like the milkmaid around here. Every few hours his little lips start to smack as he roots around for more milk. But what goes better with milk than cookies, right? So today, during my son's nap time, this milkmaid whipped up a batch of these deliciously toasty wafer cookies for a sweet afternoon snack. I think my husband described it best when he said they kind of taste like Cracker Jacks. They are subtly sweet with a nice nutty flavor and, not to mention, they are highly munchable. Be careful though, because it's hard to stop at just one cookie!

Another great variation of this recipe is exchanging toasted almonds and flax seeds with toasted sesame seeds. It creates a whole new tantalizing flavor that is truly unique.


Almond Flax Wafer Cookies

Ingredients:
1/2 cup crushed almonds, toasted
1/2 cup flax seeds, toasted
1 cup firmly packed dark brown sugar
4 tbsp. (1/2 stick) unsalted butter, softened
1 egg, lightly beaten
1/2 cup all purpose flour
1/4 tsp. salt
1/8 tsp. baking powder
1 tsp. fresh-squeezed lemon juice
1/2 tsp. vanilla extract

Preheat oven to 325 F. Cover cookie sheets in parchment paper. Toast the crushed almonds and flax seeds in a heavy skillet over medium heat until they are golden brown.

Beat the brown sugar and butter together in a medium-sized bowl for several minutes until fluffy. Beat in the egg. Whisk together the flour, salt, and baking powder, then add these dry ingredients to the butter, sugar, egg mixture, mix well. Stir in the toasted almonds and flax seeds, vanilla extract, and lemon juice. 

Chill the dough for 30 minutes in the refrigerator. This makes it easier to drop the cookies on the sheets.

Drop by teaspoonful onto prepared cookie sheets, leaving space for the cookies to spread. Bake for approximately 15 minutes, or until the edges are slightly brown. Cool for a minute or two on the cookie sheets, then transfer to a rack to continue cooling.

Thursday, September 8, 2011

Pistachio Encrusted Salmon

I live in the Northwest. I've been fishing ever since I could walk. I even worked in the seafood department at the local grocery store in high school. And yet, until two days ago, I had never cooked a piece of salmon in my life! Luckily for me, my husband just went salmon fishing over the weekend and brought us home a beautiful salmon for me to play with in the kitchen. But much to my dismay, I hadn't a clue how I wanted to cook it. Every time my family had salmon, my dad would usually season it with lemon, garlic, and a combination of herbs; it was the classic combination of seafood and citrus. But to me "classic," though always delicious, had become boring. I wanted to try something new.

Then it hit me....I have pistachios!

It was by rare chance that I had just recently bought pistachios for the soul purpose of trying new recipes with them. And the idea struck: pistachio encrusted salmon! I had seen a recipe for pistachio encrusted salmon weeks ago and was tempted to give it a try. With pistachios waiting anxiously in my pantry and my husband proudly slapping a large salmon onto the cutting board, it was as if the universe was saying: "make me dinner!" The end result was heavenly: fresh juicy salmon coated in a crispy golden layer of toasted flavors that tickled my pallet. This recipe makes restaurant quality fish in less than 30 minutes and will easily impress your family and friends.


Pistachio Encrusted Salmon

Ingredients:
1/2 cup unsalted pistachios, shelled
1/3 cup Panko breadcrumbs, or other type
2 Tbsp. fresh grated Parmesan cheese
1/4 tsp. salt
1-2 Tbsp. olive oil
4 (3-oz.) salmon fillets
2 Tbsp. Dijon mustard

Freshly ground black pepper to taste

Heat the oven to 425 degrees. Spray baking sheet with cooking spray. In a small food processor combine nuts, breadcrumbs, cheese, salt & pepper. Pulse mixture until fine. Transfer nut mixture to a shallow bowl, drizzle with olive oil and toss with a fork until crumbs are well moistened.

Spread the top of each fillet evenly with mustard. press the mustard-coated side of each fillet into the crumb mixture to generously coat the fish. Set the fillets, coating side up, on the prepared pan. Sprinkle the remaining crumb mixture over the fillets to form a thick crust.

Bake fillet until top is crisp and browned and the fish is cooked through, 10-12 minutes, depending on thickness.

Friday, September 2, 2011

Braised Kale

I'm back! On July 18th I gave birth to my beautiful baby boy, Andy, and for the past month we have been living off of the generosity of our family and friends. Thanks to them, our refrigerator remained full and I was able to focus my attention on our new little bundle of joy.

Well, as life would have it, two weeks after bringing Andy home, our apartment complex decided to raise the rates of our rent by $200 a month. With a newborn in our arms, we were suddenly facing a difficult reality: we had to pack up and move. Luckily we have family that offered us the use of their family-room to live in for awhile while we save up for our next home. It's basically like living in a studio apartment, which is actually pretty cozy. But unfortunately I had to put half of my kitchen supplies into storage while the other half is now crammed into the built in bar in the family-room. The funny part is, even though we have less space to store my pots and pans, I have more counter space to work with. Plus, I get to take advantage of my family's beautiful garden full of fresh vegetables and fruits! And so The Tasty Spoon continues in a temporary kitchen but with more resources for great new recipes!....It's the silver lining.

I am so excited to be back in the kitchen. Granted, now with a newborn around, my cooking consists of me frantically running around the kitchen as soon as the baby passes out in a milk induced coma. It certainly takes some adjusting to. But a couple days ago, I managed to sneak off and harvest some deliciously lush kale from my family's garden to have with dinner. When I was pregnant, my friends made me a dish that included braised kale and since then, I had been dying to try my hand at making it. So for the first meal I have made since I have been pregnant, and for the first meal in my new kitchen, I decided to try making braised kale. Not only was it surprisingly easy to make, but it was absolutely delicious! I served it on wild rice topped with meatballs in peanut chili sauce (check out the recipe at: http://thetastyspoon-gingerales-kitchen.blogspot.com/2011/04/crock-pot-meatballs-in-peanut-chili.html). This recipe would also mix well with pasta, or simply served as a side dish.


Braised Kale

Ingredients:
1 tablespoon olive oil
1 teaspoon salt
½ teaspoon freshly ground black pepper 
3/4 teaspoon red pepper flakes
6 cloves garlic, minced
6-8 cups (firmly packed) torn kale pieces
1 cup chicken broth

Heat the oil in a large skillet over medium-high heat.

Add the salt, pepper, red pepper flakes, and minced garlic and sauté for about 2 minutes.

Add the kale and chicken broth, stirring occasionally for 8 to 10 minutes until the kale is soft.

Remove from the heat. Serve immediately.

Thursday, August 18, 2011

A Tip


Today, I am just sharing a tip.  To add a nutritional boost to your baked goods, try adding ground flax seeds.  They are a good source of dietary fiber and Omega-3's and are basically undetectable when small amounts are added.  I toss it in muffins and cakes all the time!  I usually don't do a specific amount, just a few tablespoons.  You can find ground flax seed at most grocery stores.  Try it out!  If you're like me, it'll help justify eating that piece of cake... because now it's good for me...

Image: digiyesica


-Katie

Tuesday, August 16, 2011

Cheating


This may be cheating, but I'm going to do it anyway.  Today, I am just referring you to a recipe... not actually sharing one of my own or one of my old favorites.  But if it is cheating, I think you'll all thank me for it.  I am an avid reader of food blogs.  I just love them.  My favorite is Orangette  by Molly Wizenberg.  Her writing is witty and charming and not one of her recipes has ever failed me.  Trust me, I have used a lot of them.  But today I am here to tell you about one in particular:  Deviled Eggs with Basil Aioli and Capers.  Follow that link for a truly kick-ass deviled egg recipe.  Now, I am not usually a fan of deviled eggs, but now I am a believer.  I made these for a family reunion held a few weeks ago.  The whole time I was making them I was whining about how terrible I was making them look and how ugly they would be.  They did look rather messy, but in the end I didn't care and neither did the people eating them.  They were truly delicious.  One bite and I was sold.  Then I was sold 3 more times... Moving away from my gluttonous habits, I highly, HIGHLY recommend you make these.  Share them with others, they will rave.  

I also suggest you check out Molly's recipe index.  There are a lot of fine recipes there.  Particularly under the Cake section...   

Image by: boughtbooks

-Katie

Wednesday, August 3, 2011

Easy, Breezy, Beautiful Caprese!


Well, I'm a little late.  When Jen asked me to be a guest blogger I think we both expected me to get right on it.  But, you know, life happens.  So here I am, finally!  I'm going to cut right to the chase.  Caprese salad.  If you have never had it, I will mourn for you.  I have this obsession with fresh mozzarella, basil, and tomato.  This obsession is never sated.  This obsession is why I go weak in the knees for a Margherita pizza.  So, now that you know this about me, I think you will understand why I love Caprese salad so much.  Last night we ate this for dinner with a chunk of warm baguette.  Today I ate this for lunch with a chunk of slightly stale baguette.  Every time I take a bite, I marvel at the flavors going to town on my taste buds.  And it just keeps me coming back for more.  For some reason my boyfriend hates the word Caprese, so it also sometimes goes by "that one salad with basil and mozzarella" and then when he doesn't know what I'm talking about I have to say, "You know... caprese?"  And then he shudders.  Whatever it's called, one thing is certain, it's delicious.

Caprese Salad

This is more something you throw together rather than a recipe, but I'll do my best with the directions.

1 container fresh mozzarella balls (I got mine at Whole Foods for $3.99)
Tomatoes - I used cherry last night, and on-the-vine today.  If you use anything but cherry or grape tomatoes, slice thin and remove seeds.
Fresh Basil
Olive Oil
Balsamic Vinegar
Salt & Pepper

For one salad, wash a small handful of basil and pat dry.  Place on a small salad plate.  If using cherry/grape tomatoes, top basil with a small handful.  Otherwise, thinly slice one tomato and remove seeds.  Place tomato on top of basil.  Depending on how much cheese you want, add 4-6 mozzarella balls.  Drizzle with olive oil and balsamic vinegar and sprinkle with salt and pepper to taste.

Makes a nice appetizer salad or a light dinner.

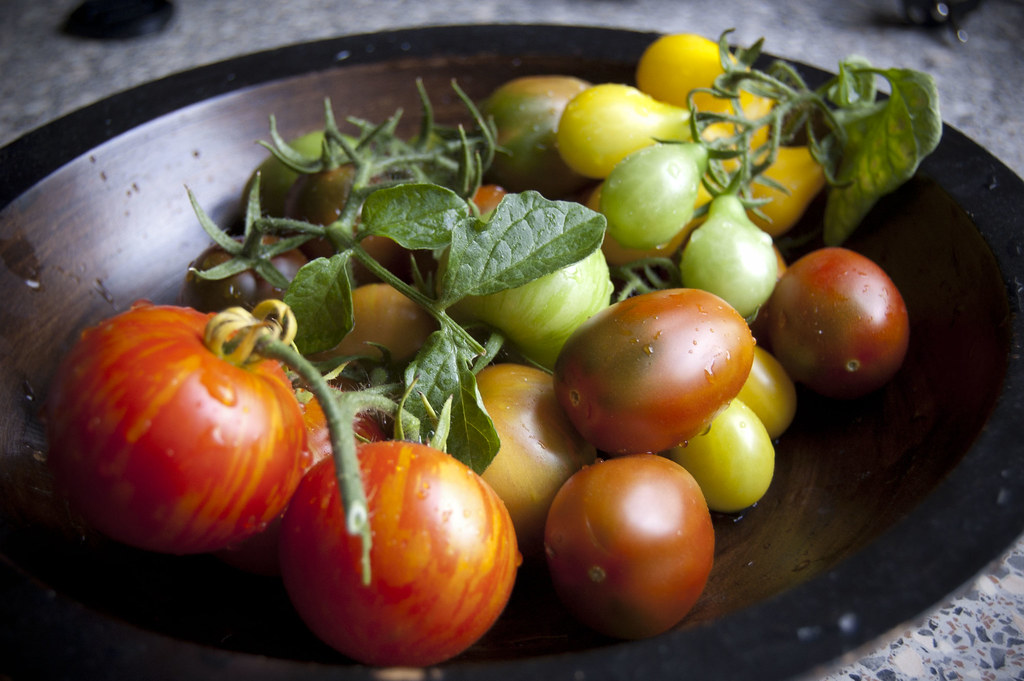
Also, I wish I had a picture to share with you, but both salads were eaten before I even thought to take a picture.  So here's someone else's picture of some tomatoes!  Image Tomato heaven by: holtmi.


-Katie

Tuesday, July 5, 2011

Cake Pops

In the 60s it was all about the jello molds. At every family gathering, every group picnic, every Church event; someone would bring some scary gelatinous creation that would wiggle its way onto the table. But when people began to create gelatin dishes that where comprised of cooked meats, canned peas, and steamed carrots (no joke! I've seen that recipe before!), luckily the trend went down the drain. In fact, I'm sure it went down the drain quite literally as everyone ran to call Ralph on the big porcelain telephone, if you know what I mean!

In the early 2000s low-carb diets washed over the nation, pegging bread as the enemy of all who wished to lose their unwanted weight. The king of all low-carb diets was the Atkins diet which promoted the idea that protein equals good whereas carbohydrates equal bad. --No thanks, I won't have that piece of toast, but please pass me some more bacon!-- Soon, fast food restaurants offered "healthy" options where you could order a cheese burger without the bun. And many grocery stores began to stock their shelves with new "low-carb" breads that tasted just about as good as a toasted piece of shoe. The irony that Dr. Atkins, the founder of the popular diet, died of a heart attack was not lost amongst his many followers. The diet quickly followed its creator, never to be seen again.

As each year goes by, new food fads take hold of our nation's insatiable hunger. Some are good, and some are bad. And although I happen to like this year's current food trend, I'm afraid that some day I will look back on it with a hint of remorse. This year's popular treat is not only far from healthy, but its high sugar content could probably send a diabetic into a nice frothing coma. I am, of course, speaking of none other than the sinfully delicious and dangerously trendy Cake Pop. This dessert has quickly become one of the hottest dessert items out there, tantalizing many people with its simple sweet design that comes in a convenient single serving on a stick. With Cake Pops resembling another timeless sugary favorite, the lollipop; people everywhere are attempting to make these popular creations for every special event. I am embarrassed to say that I am no exception. In fact, I was quite giddy to finally be in the "in crowd" when it came to this year's food fad. I've never been one to follow the masses, but this time, I am rolling along side with the best of them. And although we may look back on this trend like the once popular jello molds of the 60s or the crazy diets of the 2000s, I will enjoy the sugar overload and ride the trend until the next one takes hold.

This recipe, though it sounds really easy, does take a lot of time and patience. But when all is said and done, the end result is quite delicious. Of course, it's just about one of the richest desserts I've had in a long while (which is really saying something considering how many sweets I consume), so come prepared with a glass of milk or water when you are ready to try one of these little pops. Although they are small in size, I'm pretty sure their sugar content could easily match, if not surpass, a large piece of cake. So enjoy this trendy dessert along with the inevitable sugar high that is sure to follow.


Cake Pops

Ingredients:
1 box cake mix
1/2 of a 12oz container of frosting
White chocolate for dipping (make sure NOT to use white chocolate chips. They wont melt correctly. Be sure to use white chocolate that is specifically for melting and dipping such as Baker's chocolate!)
Sprinkles
Lolly sticks (I just used bamboo skewers that I cut in half)
Styrofoam or other support base for drying the cake pops on

Bake the cake according to the package. Set aside to cool.

Once the cake is cool, crumble it finely with a fork. Scoop the frosting (only half of the container) into the cake and stir until it starts to combine. Add more frosting as needed. The mixture will begin to feel soft like dough.

Using an ice cream scoop, or your hands, make round shapes about the size of a golf ball. Line on a baking sheet and freeze for 20 minutes. After 20 minutes, stick a lolly stick into each ball and freeze over night. Be sure to dip the tip of the stick into the melted chocolate BEFORE you stab into the cake ball. This will help secure the cake ball onto the stick, preventing it from sliding down the lolly stick later on.

Once the pops are firm, melt the chocolate in the a microwave safe bowl for about 1-2 minutes, or until thoroughly melted. Dip each pop in and gently shake off the excess chocolate. Top each one off with sprinkles right after dipping in chocolate before the chocolate sets.

Using a piece of Styrofoam or other support base, stick each cake pop upright so the chocolate can drip down over the cake pop as it sets. Store in an airtight container in the fridge or freezer until ready to serve.

Thursday, June 30, 2011

Guest Blogger

The time is drawing near now where I will be on maternity leave from my blogs. I am due any day now and, with a newborn around, I don't expect to be doing much blogging in the month to follow. So in order to keep this blog still active, I've requested the help of my best friend and fellow foodie, Katie Schwager, to be a guest blogger until I am ready to step back in. I can say first hand that Katie's cooking is absolutely delicious, bubbling over with unique worldly flavors, and prepared with a true passion for food. I have no doubt that she will have a lot to bring to the table (lame pun totally intended!).

In the mean time, I will keep blogging until I pop. But since I don't know when that will be exactly, I figured I should give my readers a heads-up that there will be a guest blogger in the near future. I hope you enjoy her recipes as much as I have!

Below is the recipe I used to announce our pregnancy to my parents. It's good for a laugh.--It's titled "Sunshine buns" after the nick name "Sunshine" we had for our son before we knew the gender.


Sunshine Buns

Ingredients:
1 Joe
1 Jen
1 fresh egg
1 tablespoon of salt
A large bed of flour

Take your Joe and Jen (making sure your Jen is extra ripe) and bring them to a full boil, stirring occasionally.

When both Joe and Jen are thoroughly heated, peal them down and place them gently into a bed of flour.

Mix Joe and Jen rigorously, adding the egg and the tablespoon of salt into the mixture right at the precise moment.

When at least one grain of salt has been successfully added to the egg, place the mixture into the oven, preheated to 98 degrees.

Bake for 9 months. The mixture will puff up gradually. When the bun is plump and reaches a nice pink color, remove from the oven and love unconditionally.